iPhone food photography lets you snap and share high-quality photos to your online community. You want to share how satisfied your tummy got whether you’re at your favorite restaurant or you just had the courage to finally try and cook that dish you’ve been dying to copy. Besides, you do not need to bring that chunky camera anymore.
Vice President for iPhone Product Design Greg Mansfield explained that it was found in their study that people use their iPhones mostly to take photos. They patterned the iPhone to a DSLR camera in terms of screen resolution, the inclusion of a 15 mm macro lens and a maximum ISO of 6400 guaranteeing that even you are in a dimly lit place, the device can work like magic.
For a foodie or a food blogger, photos garnering as many likes, hearts, pins, and retweets, make their postponing-my-first-bite act all worth it. You may want to better your skill at iPhone food photography, make your food as appetizing as possible or you just want to fill your iPhone gallery with the meals you’ve already tasted in the most tantalizing angle, these tips on how to better take scrumptious and crave-inducing iPhone food photography is for you.
10 Tips for Crave-inducing iPhone Food Photography

Use a macro/telephoto lens
The macro/telephoto lens is known for its superb optical system that can focus on full life-size images with 1:1 magnification. With its feature to focus on details in its image sensor, it only requires a minimum of 20 cm distance from the subject you are shooting allowing you to frame the subject in such a way that details are finely highlighted.

Natural light never fails
Before you snap, make sure that your subject is at the nearest natural light source possible, say a window or a door. Make people hungry by utilizing the best light – natural light. However, be cautious when you are using direct light. It may appear too harsh on the photo and may produce unwanted highlights and shadows. Your lighting can make your salad look fresh or stale. Always go for a warm, soft and naturally diffused light If natural light is not accessible try to use the light panel as an alternative.
Use the auto-exposure lock
Your iPhone will initially provide you with a default exposure. With iPhone food photography, you will surely have multiple shots to obtain that perfect photo you will post.
To achieve this, you have to utilize your phone’s feature, auto-exposure lock, to ensure that your lighting will not change from dark to light. Lock it at a certain point so that it will not cause inconvenience.
Shoot up close to make your followers crave
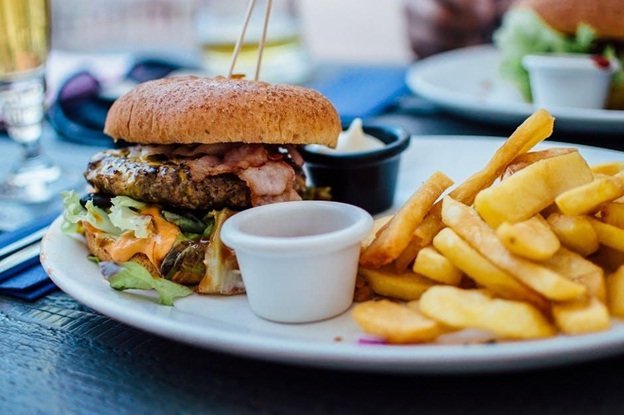
Shooting your food up close features how drool-worthy it is and how its palatability can be transported virtually to your online community. The most popular shot for an iPhone food photography is the front ¾ view. It is a kind of shot wherein the subject is only 4 to 5 inches away. Whenever you use this type of shot, you engage people more to take time and appreciate your photo. In this way, people can see a perspective on how the food is actually eaten, close and with enough details.
Do. Not. Zoom.
Relax, your subject isn’t a moving one and it is more than safe to shoot close. As you set up the food, it is at your expense whether you will shoot from the side, from the front or from above. Zooming is never an option in food photography or it does not make any sense, at all. One of the many disadvantages is that it results in a poor quality image and it produces a grainy photo.
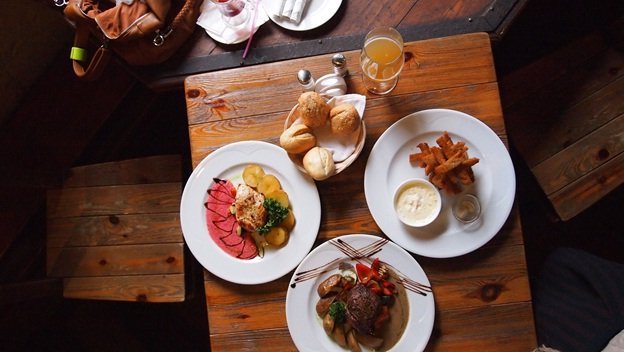
Overhead shots can save the day
Sometimes foodies and bloggers seem to get bored with the good ole ¾ shots. Instances such as aesthetics are key, either asparagus are crisscrossed, or a salad is drizzled with Mediterranean dressing. Obviously, taking a ¾ shot will eliminate the possibility of featuring the meal’s aesthetique. A flat lay showcases everything there is. Foodies and bloggers commonly use the overhead shot or “flatlay” to create a more graphic image.
Simple, neutral background works best
Simple and neutral backgrounds are advised for effective iPhone food photography shooting. You would aim for the photo to be all about the food. Thus, you should avoid backdrops heavy on the print that overpowers the food. The goal is always to emphasize how scrumptious the food is and not on how you can spot the funkiest background. Less is always more.

Style and garnish your subject
Styling and garnishing an iPhone food photography is 20% of the photo. As the food is enticing on its own, adding some complementing silverwares, organic herbs, and spices, ingredients of the dish on the side, table napkins for texture, etc. can add more feel to it. Garnishing and styling your shot can add more color and life to the food.

Include a hangry hand in the frame
A hand going for that first bite of a sandwich clubhouse in an iPhone food photography is another way to make your online community hungry and want to try the same thing you’re eating. The hangry hand is a teaser of not only how drool-worthy the food is but how bad you want to try it. You can’t even wait but go dive into that clubhouse before snapping the photo!

Edit to enhance not to exaggerate
There are a lot of user-friendly iPhone photo editing apps to edit your freshly snapped photo out there. Snapseed and VSCO are just two of the many. These apps can help you enhance the saturation, tone, exposure, brightness, contrast, highlights, shadows, etc. of your photo.
A photo is appreciated for what it is. Post-processing a photo doesn’t need to be complicated nor a handful. A thing to keep in mind as you edit is that you should maintain the “natural look” of the subject. You wouldn’t want a person to perceive your food photography as raw or burnt, right?
very nice information.
Thanks for your sharing, I think Backup Regularly is very important, it could store all the information without missing.